Replacing old door hinges may seem trivial, yet it's vital for home maintenance. Many homeowners overlook the importance of quality hinges. According to a report by the Home Improvement Research Institute, nearly 40% of door problems stem from faulty hinges. Knowing how to replace old door hinges with new ones can enhance both functionality and aesthetics.
Durability is key. Professional studies show that new, high-quality hinges improve a door's lifespan significantly. They reduce wear, preventing annoying squeaks and misalignments. However, the task can be daunting for some. It involves choosing the right size and type, which can be overwhelming with so many options available in the market.
Many DIY enthusiasts learn through trial and error. The process may not always go smoothly, and mistakes happen. Choosing the wrong hinge can lead to inefficiency. It’s essential to pay attention to detail. With the right guidance, replacing hinges can be straightforward and rewarding. This guide provides ten easy tips, ensuring you feel confident in your home improvement journey.
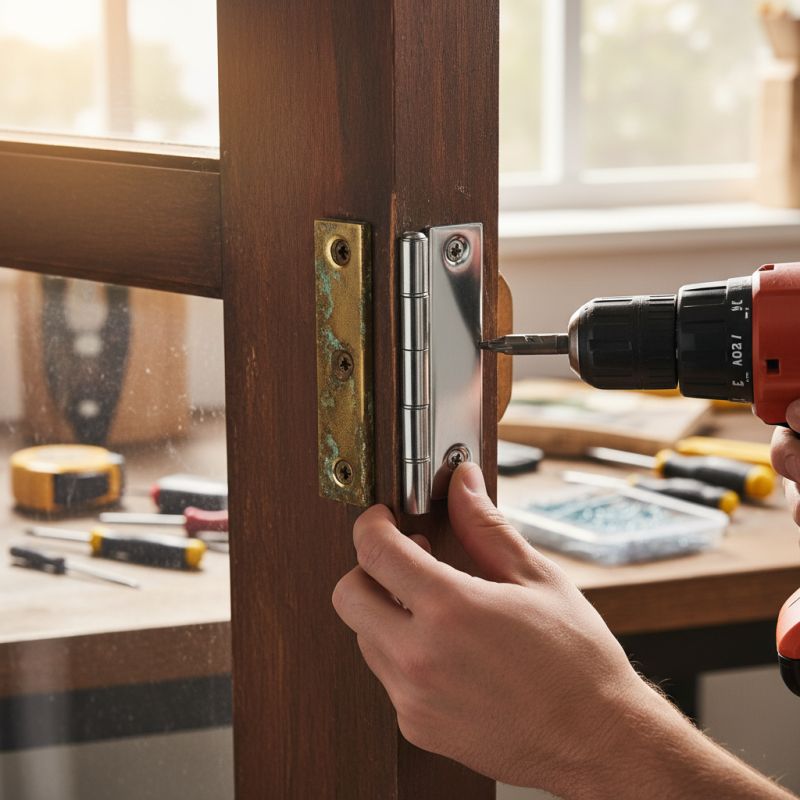
When replacing old door hinges, understanding their types is crucial. Many hinges exist, including butt hinges, continuous hinges, and pivot hinges. Each type serves different purposes and fits various door styles. For instance, butt hinges are perfect for standard doors. Continuous hinges offer stability for heavy doors, while pivot hinges help with unique designs or heavy traffic.
Tips to consider include measuring your current hinges accurately before purchasing replacements. This ensures a proper fit. Additionally, think about the material of the hinges. Stainless steel is durable and resists rust, making it ideal for external doors. Remember, finish matters too. It can complement your door and interior decor.
Another tip is to consult a knowledgeable hardware store. They can provide insights into the best hinge type for your particular door. Keeping in mind the weight and frequency of usage will assist in making a wise choice. While many homeowners may rush through this selection, taking the time to understand hinges will pay off in the long run.
When replacing old door hinges, having the right tools and materials is essential. Start with a screwdriver that matches your hinge screws. A power drill can make the job easier, especially for stubborn screws. You may also need a chisel for adjustments, particularly if your new hinges are a different size. A level helps ensure your door hangs straight.
It's wise to gather materials beforehand. New hinges should match the color and style of your door. Choose screws that fit properly; longer screws offer better support. Keep wood filler handy for any accidental damage to the door frame. A cloth helps clean the area, and safety goggles protect your eyes from debris.
Expect surprises during the process. Old screws may be rusted. Removing them might take additional effort. If the door doesn't align perfectly, adjustments will be necessary. Sometimes, hinges need to be repositioned or even replaced due to wear. This is a good opportunity to reflect on the door's condition. Each hinge replacement can turn into a learning experience, enhancing your DIY skills.
Removing old door hinges is a task that many homeowners can handle. To begin, ensure you have the right tools. You’ll need a
screwdriver, a hammer, and possibly a
chisel. Start by removing the screws connecting the hinges to
the door and the frame. It’s important to support the door as you remove each hinge; this can prevent injury and
damage to the door.
According to data from industry experts, improper hinge removal can lead to frame damage, which often increases
repair costs by up to 30%. When unscrewing, be cautious. If screws
are rusted or stuck, applying a penetrating oil can help. Gently tap the hinge
with a hammer if it doesn’t budge. Each action should be deliberate, ensuring the door remains stable throughout
the process.
After the hinges are removed, inspect the door and frame for any potential issues. Evaluating the surrounding area
for wear and tear is essential. Misalignment from old hinges can affect the new ones. Take the time to clean the area
thoroughly. Inconsistent installation can result in unexpected squeaks or complications,
detracting from the overall stability of the door. Always approach replacement with care and attention to detail.
Replacing old door hinges with new ones can significantly enhance your door’s functionality and aesthetics. The installation process is straightforward, but attention to detail is essential. Start by removing the old hinges using a screwdriver. Ensure you’re holding the door steady to prevent it from falling.
When choosing new hinges, match the size and style of the old ones for a seamless look. Take care to align the hinges correctly. Misalignment can cause the door to stick or warp. Use a level to check that the door hangs straight. A slight tilt might lead to uneven wear on the hinges over time.
After installing the new hinges, test the door’s movement. Open and close it several times to check for smooth operation. If you notice any resistance, double-check your alignment. Small adjustments can make a big difference. Remember, patience is key in this process. Don’t rush; take your time to ensure everything is just right. This attention to detail will yield lasting results.
Replacing old door hinges can transform the functionality of doors. Proper alignment is crucial for ensuring that hinges work smoothly. When you install new hinges, focus on how well they align with the door frame and the door itself.
To ensure proper alignment, start by removing the old hinges carefully. Check the existing screw holes for any damage. If they are worn, consider using wood filler to create a stable base. When positioning the new hinges, use a level to make sure they are straight. After attaching the hinges, test the door before fully tightening the screws. This step is vital for adjusting any misalignment that could cause future issues.
Another tip is to use the right screws. The screws should match the size and length of the original ones, but they should also be sturdy enough. If you notice any gaps during installation, you may need to make adjustments to ensure a snug fit. Sometimes, hinges can seem aligned but still create resistance. This is a sign to double-check your work and test the door movement multiple times. Small details can lead to significant improvements in door functionality.
| Tip Number | Tip Description | Tools Needed | Estimated Time |
|---|---|---|---|
| 1 | Choose the right size hinges for your door | Ruler, Calculator | 10 mins |
| 2 | Remove the old hinges carefully | Screwdriver, Hammer | 15 mins |
| 3 | Align the new hinges with the door and frame | Level, Pencil | 10 mins |
| 4 | Mark the screw holes for drilling | Pencil, Drill | 5 mins |
| 5 | Drill pilot holes for the screws | Drill | 10 mins |
| 6 | Attach the new hinges securely | Screwdriver | 10 mins |
| 7 | Check the alignment of the door | Level | 5 mins |
| 8 | Test the door's functionality | None | 5 mins |
| 9 | Apply lubricant to the hinges | Lubricant | 2 mins |
| 10 | Check for any squeaks or issues | None | 5 mins |
: You will need a screwdriver, power drill, chisel, and a level.
Gather new hinges, appropriate screws, wood filler, and a cloth to clean.
Apply penetrating oil and gently tap the hinge with a hammer.
Use a level while installing the new hinges to check alignment.
Expect stubborn screws, possible frame damage, and misalignment issues.
Supporting the door prevents injury and avoids damage during the process.
Yes, it can increase repair costs by up to 30% due to potential damage.
Inspect for wear and tear and check for misalignment around the old hinges.
You may need to reposition the hinges or make adjustments on installation.
Ensure consistent installation and attention to detail during the process.
This article provides essential insights on how to replace old door hinges with new ones, making the process straightforward and manageable for DIY enthusiasts. It begins by explaining the various types of door hinges that might be suitable for your project, followed by a detailed list of tools and materials required for the task.
The step-by-step guide carefully outlines how to safely remove old door hinges, ensuring that no damage occurs to the door or frame. Subsequently, it illustrates the installation process for new hinges, emphasizing a methodical approach. Additionally, the article offers valuable tips for ensuring proper alignment and functionality, ensuring the door operates smoothly and effectively after the replacement. Overall, this comprehensive guide empowers readers to tackle this home improvement project with confidence.

MX Lock